TL;DR Summary
- In-place archives effectively act as special searchable mailboxes associated with a standard mailbox.
- In-place archives are a premium Exchange feature.
- Office 365 archive mailboxes offer from 50GB to 1.5TB of additional space.
- BackupAssist 365 v1.9.4 and later allows you to automatically back up Office 365 in-place archives.
What are in-place archives in Office 365?
In-place archives are a premium Exchange feature. In short, they are special mailboxes that make it easier for users to store and search for emails without cluttering up standard user mailboxes. In-place archives can also play an important role in enterprise retention policies.
Microsoft’s article on in-place archiving does a good job covering the technical nuts and bolts, but it doesn’t make it clear why you should care about in-place archives.
To understand the benefit of in-place archives, consider a user with an Exchange Mailbox that exceeds the standard mailbox size limits (usually 50GB). Typically, to search their emails for relevant information or access an old email, they’d need to leverage PST files somehow. For example, they may store them locally and mount them to Outlook. While that workflow is feasible, it is hard for an administrator to oversee and implement enterprise retention policies. It’s also inconvenient for the user. Those PST files won’t be available from “anywhere” like most Office 365 resources.
Alternatively, if users just try to keep all of their emails, they’ll eventually reach the point where they have to delete emails to make room for new ones.
In-place archives solve this problem by creating a separate archive mailbox tied to that user’s account. After users act on an email, they manually move it to the archive or use rules to move it automatically.
With in-place archives enabled, users can declutter their inbox but still have online, indexed, and searchable archive emails available to them whenever they login. Additionally, retention policies can be implemented to move emails to an archive instead of deleting them after a given period of time.
How much more space do you get with Office 365 in-place archives?
The storage space available in an archive mailbox varies depending on your licensing. For example, Enterprise E1 licenses include 50GB archive mailboxes, while Enterprise E3 and E5 can go up to 1.5TB. You can read more about Exchange Online limits here and here.
You may have heard that archives were unlimited in the past. However, according to MC288051, that will change in November 2021 and Microsoft has already begun dropping the term “unlimited” from affected service descriptions.
Are there downsides to Office 365 in-place archives?
Extra space and simpler searches sound like a win/win, so should everyone enable in-place archives? Not necessarily.
Many users don’t come close to hitting their mailbox limits and in-place archives are a premium feature that require an Exchange Enterprise client access license (CAL).
In most cases, whether or not you should use in-place archives boils down to a tradeoff between licensing costs and the value added by in-place archives for your business. If the additional cost (and licensing or operational complexity) can’t be justified, it makes sense to pass.
What’s the difference between in-place archives and AutoArchive?
If you’ve worked with Exchange Mailboxes and archiving before, you may be familiar with
AutoArchive. The key difference between the older AutoArchive feature and in-place archives is simple: AutoArchive automatically moves old emails to off-server PST files.
Since the emails are in PST files, they are harder for users to search and don’t offer the same convenience and agility of in-place archives.
How to back up Office 365 in-place archives
Now that we know what in-place archives are, let’s walk through backing them up. BackupAssist 365 v1.9.4 and later supports backups for Office 365 in-place archives. With BackupAssist 365, you can back up your archive mailboxes as PST files outside of Microsoft’s cloud platform.
To follow along here, you’ll need to download BackupAssist 365 and have a version of Office 365 with archives enabled.
Step 1: Launch BackupAssist 365 and create a new “Office 365” backup
To get started, launch BackupAssist 365 and click Backup → Create New → Office 365 Mailboxes.
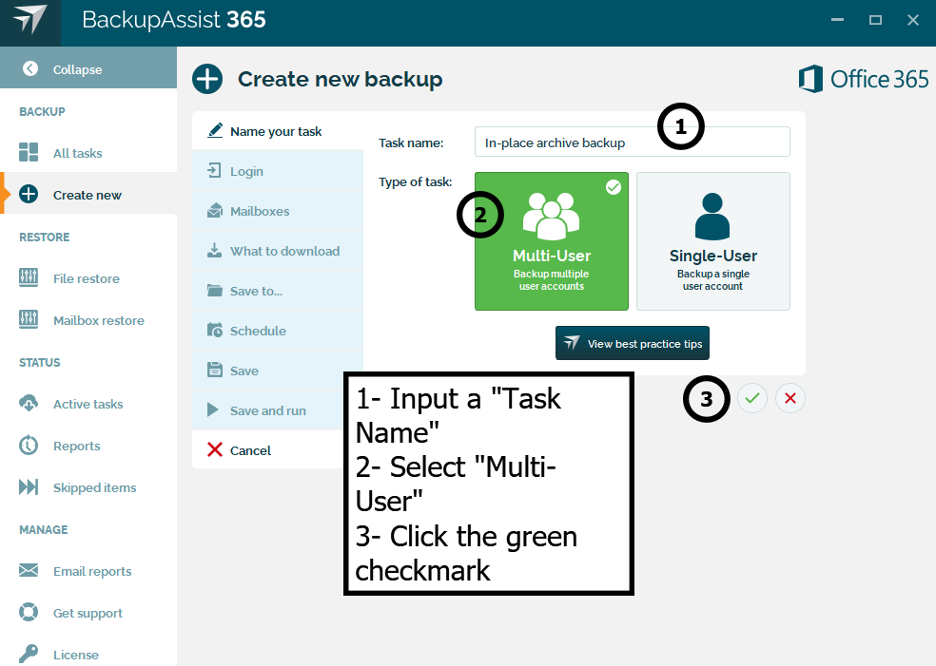
Step 2: Name the task and select Multi-User
Next, give the backup task a unique Task Name and click Multi-User. Note that you’ll need administrative privileges for Multi-User backups. Click the green checkmark icon to proceed.
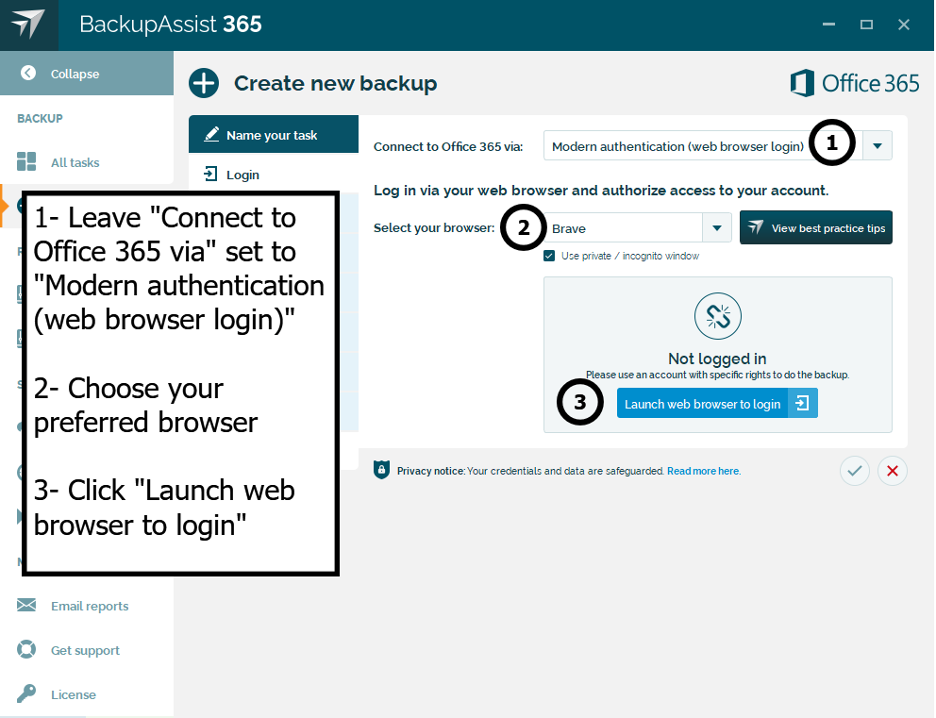
Step 3: Authenticate to Office 365
Next, we’ll use Modern Authentication to login to our Office 365 account. In addition to being our recommended authentication method for Office 365, Modern Authentication is required if you have MFA (multi-factor authentication) enabled on your account.
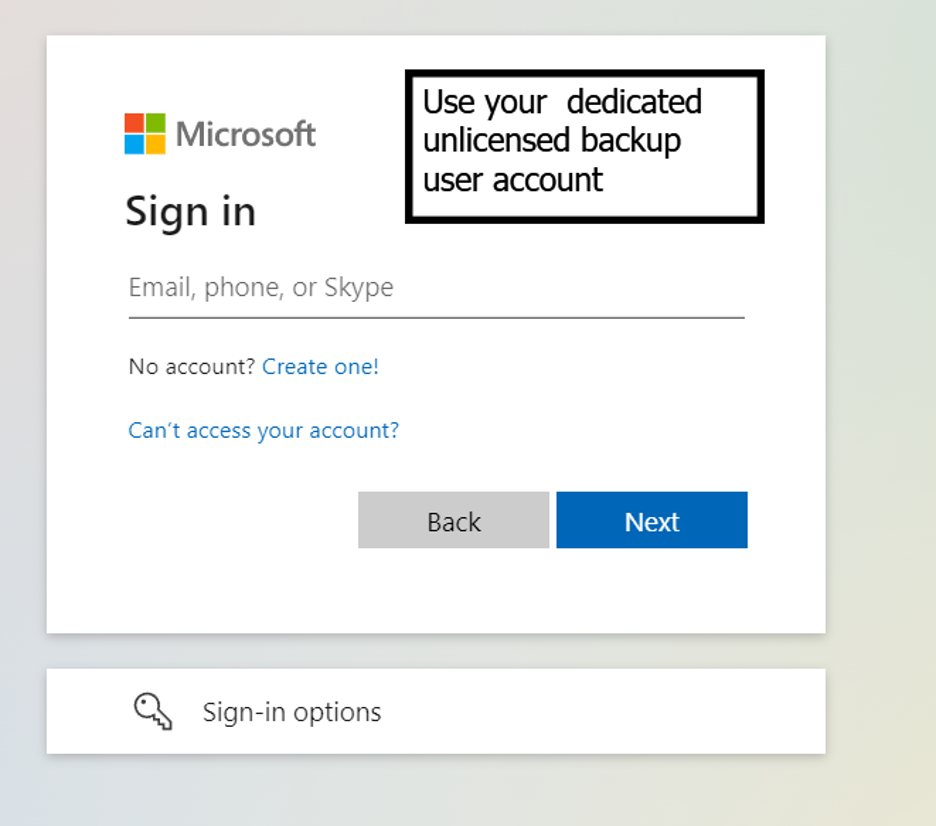
While any user with the required permissions will work, we recommend you use a dedicated unlicensed backup user account for this step.
 |
Note: For Modern Authentication to work, it must be enabled in your Office 365 account. It’s enabled by default for new Microsoft 365 instances. If you need to enable modern authentication on your account, see Enable or disable modern authentication for Outlook in Exchange Online. |
To authenticate with Modern Authentication, follow these steps.
- Ensure Connect to Office 365 via: is set to Modern authentication (web browser login).
- Choose your preferred browser in the Select your browser: dropdown. Leave Use private / incognito checked. Ensure you do NOT currently have an open private / incognito browser session running that is logged into an Office 365 account.
- Click Launch web browser to login.
- Your browser will launch. Input the credentials for your dedicated unlicensed backup user account.
- After you see the success message in your browser, close the browser window.

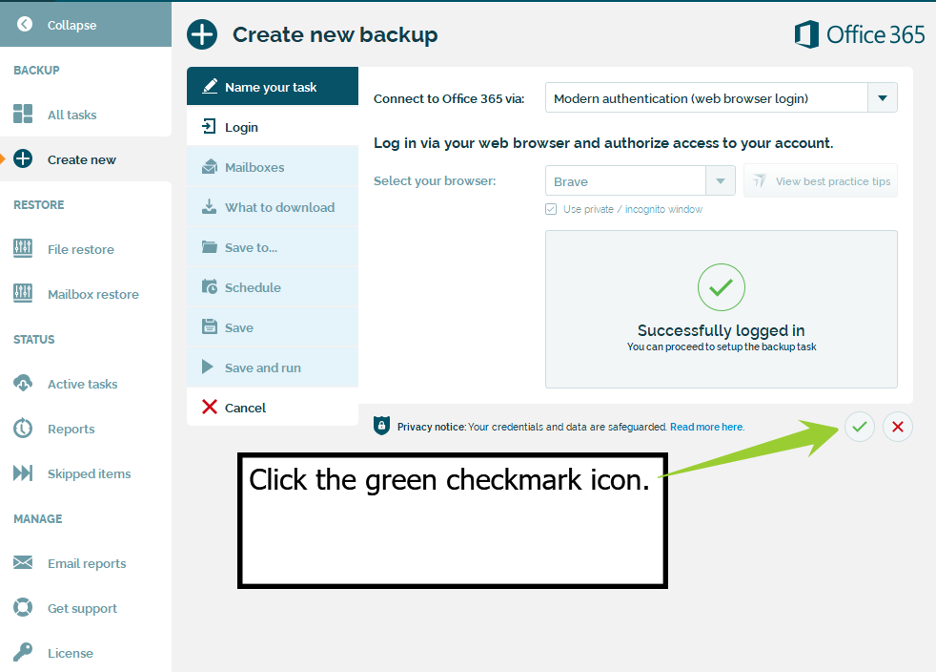
- In the BackupAssist 365 console, you will now see a Successfully logged in message. Click the green checkmark icon to proceed.
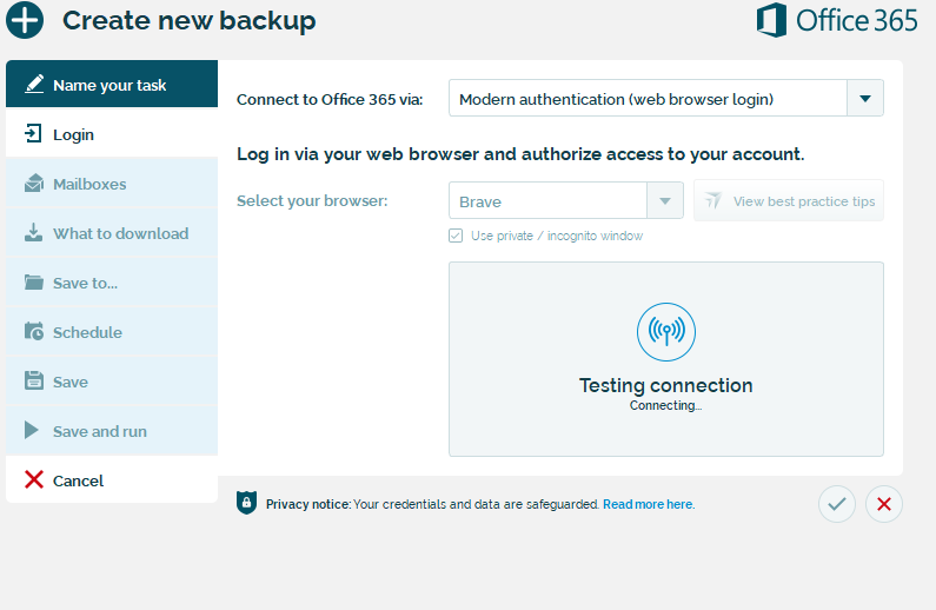
- BackupAssist 365 will automatically test the connection and then load the available mailboxes. Proceed to Step 4 once the available mailboxes are displayed.
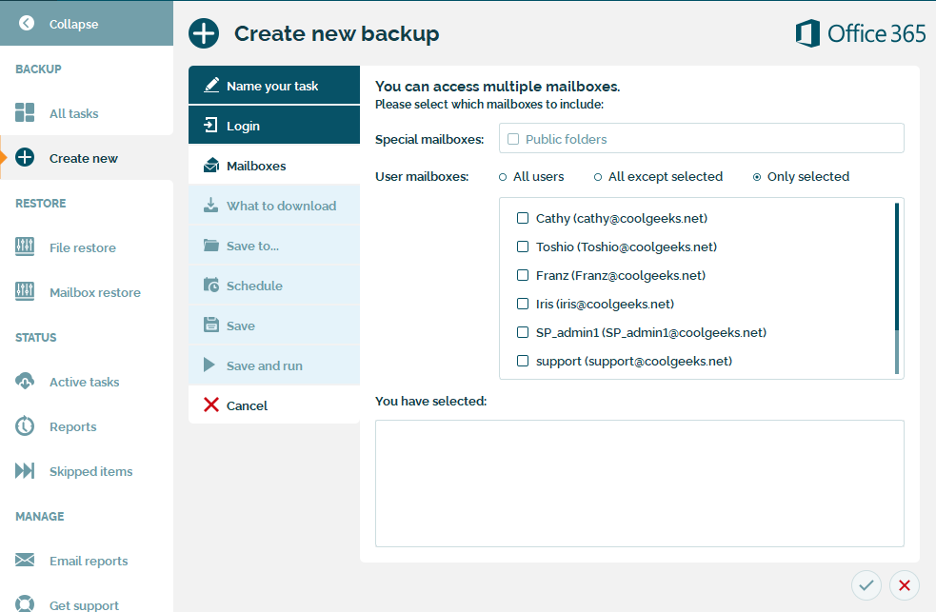
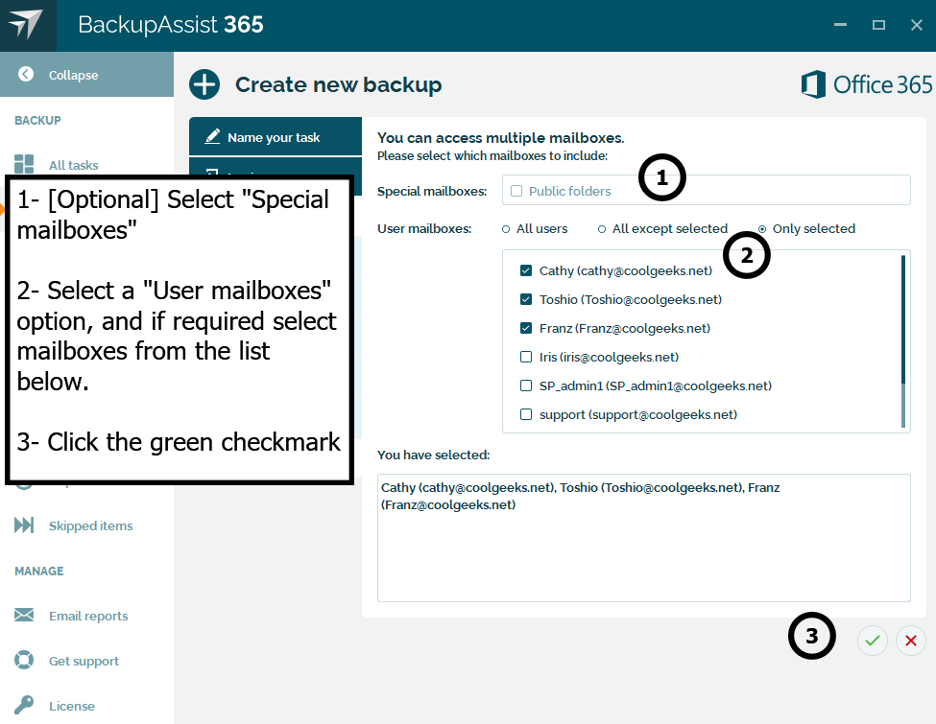
Step 4: Select the mailboxes to back up
Next, you can select the mailboxes you need to back up. Choose 1 of the 3 radio button options below:
- All users – Selects all available user mailboxes for backup.
- All except selected – User mailboxes will be backed up unless you select them in the list below the radio buttons.
- Only selected – Only the user mailboxes selected in the list below the radio buttons will be backed up.
For our example, we’ll use the Only selected radio button and select 3 User mailboxes.
If your account has any Special mailboxes (e.g. Public folders) you can select those for backup as well.
Once your selection is made, click the green checkmark icon to proceed.
Step 5: Select what to download
Next, you need to select what you want BackupAssist 365 to download. To back up in-place archives, you must select one of these two Download mode radio buttons:
- Download In-Place archive items – This option ONLY backs up your in-place archive items.
- Download main mailbox items and In-Place archive items – This option is the preferred choice for most use cases where in-place archive backups are required. It will back up both the main mailbox and the in-place archive mailbox items associated with the Office 365 account.
|
Pro-tip: For most users, we do NOT recommend switching between Download Modes. If you upgraded from an earlier version of BackupAssist 365 to v1.9.4 or later, changing from Download main mailbox items to Download main mailbox items and In-Place archive items is ok, but any other changes would result in items being excluded from backups. |
After selecting your Download mode, define a date range for the backups in the Download items based on date range section. Then, click the green checkmark icon to proceed.

Step 6: Select a storage location
Now we can tell BackupAssist 365 where to save the in-place archive backups. You can save the files locally or to a network folder such as a shared directory on a NAS.
To save the backups for the in-place archives in a local directory

- Select the Local folder: radio button and browse to a local directory local folder you want to save the files to.
- [Optional] Check the Password protect the PST files box to secure the backups with a username and password for additional security.
- Click the green checkmark icon to proceed.
To save the backups for the in-place archives in a network directory or shared folder on a NAS

- Select the Network Folder radio button provide a path to a network share.
- Provide login information for the network share.
- [Optional] Check the Password protect the PST files box to secure the backups with a username and password for additional security.
- Click the green checkmark icon to proceed.
Step 7: Schedule the Office 365 in-place archive backup frequency
Next, on the Schedule screen, set a frequency for the schedule to occur and a maximum runtime window for the backup. If a backup runs longer than the defined window, the task will stop and the next backup will pick up where this task ended. More information on using backup windows in
BackupAssist 365 can be found here.
Below we have configured our backups to run Daily at 11:11 p.m. cancel if the backup runtime exceeds 11 hours.
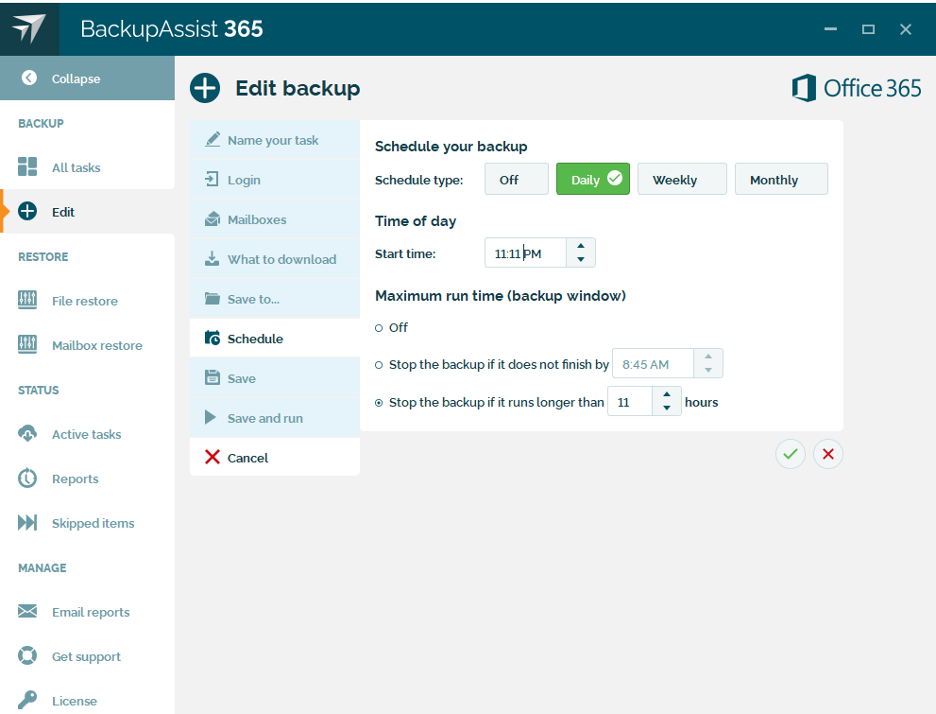
Configure your backup schedule as needed, and then click the green checkmark icon to proceed.
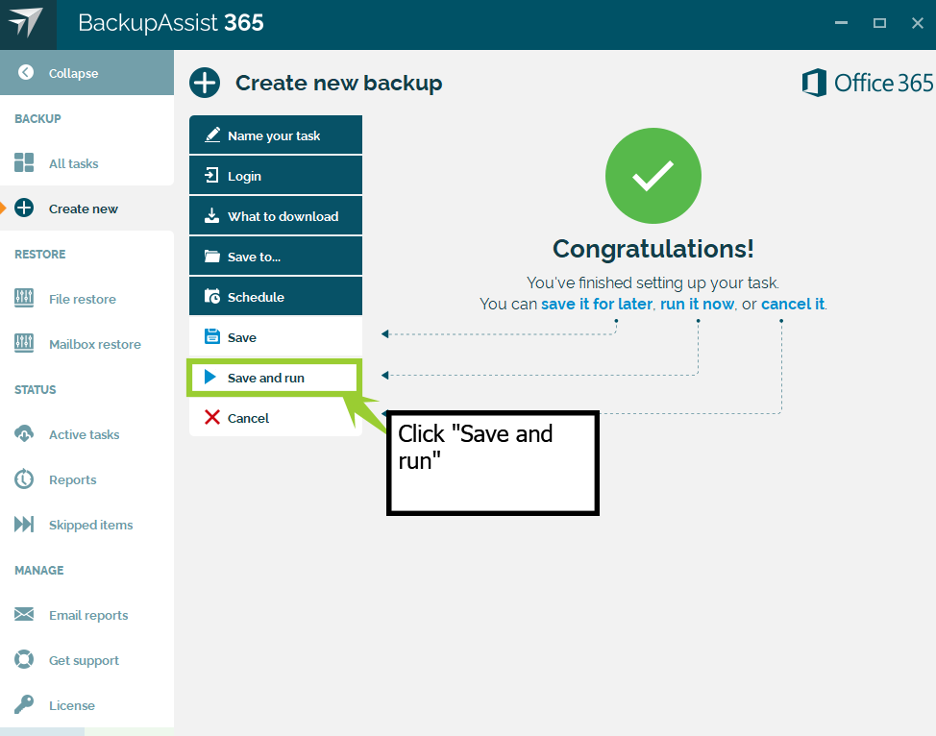
Step 8: Save and Run your Office 365 in-place archive backup
Finally, you can Save your backup, and it will run on the next configured run date you set in the previous step. Alternatively, you can Save and Run to save the backup and run it immediately. To test our configuration, we’ll choose Save and Run here.
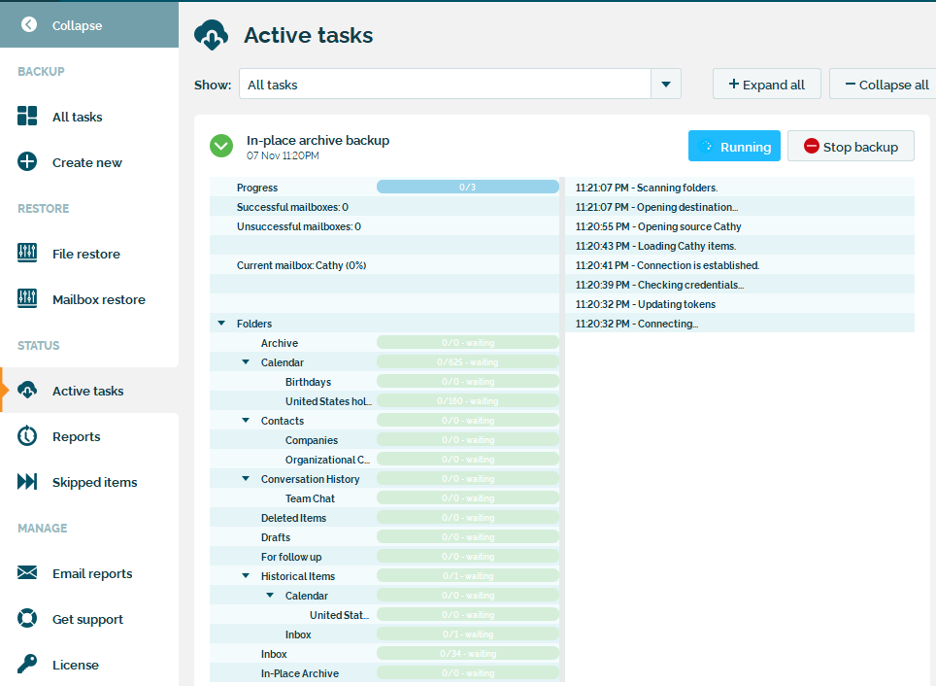
Backup times will vary depending on the size of the mailboxes. Smaller mailboxes will complete in minutes. BackupAssist 365 will display backup progress on the screen.
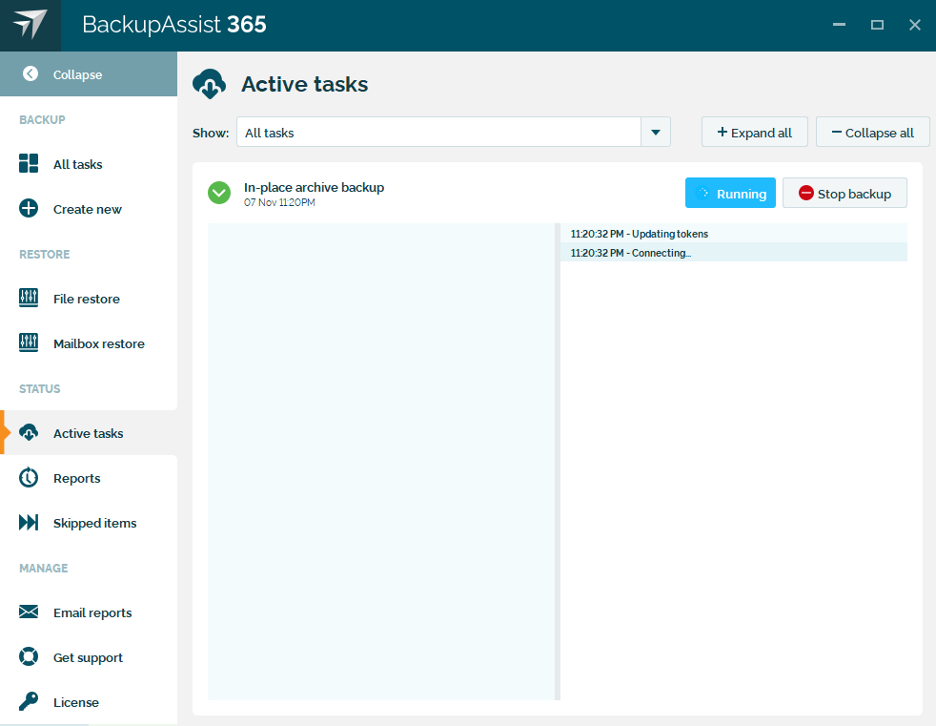

That’s it! Once the backup completes, the PST file backups of your in-place Office 365 archives will be saved in the location you specified. Additionally, BackupAssist 365 will retain a report detailing your backup job history at Status → Reports.

Final thoughts: Backing up your Office 365 in-place archives adds cyber resilience to your mailboxes
In-place archives have a lot of upsides. However, depending on Office 365/Microsoft 365 alone isn’t enough for true cyber resilience. BackupAssist 365 provides additional protections beyond the standard Microsoft 365 offering and puts you in control of your business continuity and cyber resilience strategy.