This final recovery scenario is a bit of fun, designed to show off your creativity and push the boundaries of what’s possible. We want to see what recoveries can be achieved with some “out of the box” thinking.
So, we know that there are three main pathways for recovery, as you’ve seen in the previous recovery challenges.
What else can we do?
That’s why we created an “Extreme” category – for anyone who can use non-standard methods to do a successful recovery.
What can be considered extreme? It’s up to the creativity of each challenger! My definition is something that’s “off the beaten path”, such as a combination of:
- Hardware that’s not normally considered for running a Windows platform (e.g. a Mac)
- Using a hypervisor that’s not from Microsoft – such as VMware or VirtualBox
- Running on a host operating system other than Windows (MacOS or Linux)
- Using backup hardware exposed through different interfaces – e.g. you back up via NAS, but recover via USB.
Contents
- How did I do in the challenge?
- My test setup
- How to do it
- My experiences and observations
- Performance analysis
- Conclusion
How did I do in the challenge?
By the time I did this challenge, I had already done a few recoveries, so I had got my times down to a minimum.
| Task | Duration |
| Hands-on with BackupAssist ER – Creating a bootable Lifeline Media ISO – Booting the Lifeline Media, and starting the recovery |
2 min 40 sec |
| Waiting time – Waiting for Lifeline Media to be created – Waiting for data to be copied from backup to the recovery machine. – Waiting for the recovery machine to boot and detect new hardware, and get to the login screen. |
22 min 37 sec |
| Total time | 25 min 17 sec |
For the BackupAssist ER Challenge Leaderboard, my hands-on time is 2 minutes and 40 seconds.
Here’s the video of me doing it:
My test setup
My extreme recovery was to an Apple MacBook Pro.
| Equipment | Brand / model |
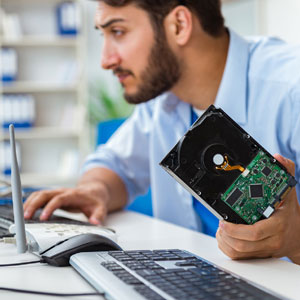
| Original machine backed up | Microsoft Surface Pro 4 (from 2015) Intel Core m3-6Y30 CPU @ 0.90GHz 4GB RAM. Windows 10, 64-bit OS |
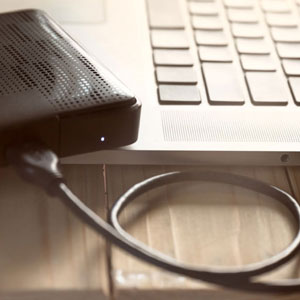
| Local backup disk | Intel SSD 520 Series 180GB (from 2012) Connected via USB 3.0 enclosure, ADATA XPG |
| Recovery machine – P2V recovery | Apple MacBook Pro 2016, 15 inch 16 GB 2133 MHz LPDDR3 2.7 GHz Intel Core i7 VMWare Fusion 11.1 |
I felt it was a good test of:
- VMware virtual hardware – would it boot the Lifeline Recovery ISO properly? Will the recovered Guest machine run properly with VMware virtual hardware?
- Using an NTFS backup disk on a Mac. Mac only enables read-only ability on NTFS. Would this cause any issues?
- Would there be any issues mapping the backup disk through to the Guest, via a USB pass through?
Under the hood: a Bare Metal Recovery on a different platform
After setting myself this challenge, I did a little research to find out whether I could do a Local VM Instant Boot, or whether it would have to be a Bare Metal Recovery.
VMware Fusion is not able to use the VHDX file format. So, the option of VM Instant Boot was off the table. However, in theory, the full Bare Metal Recovery should still be possible, just as if I were recovering to a physical machine.
How to do it
I decided to create Lifeline Recovery Media on an ISO, so I could attach that ISO to the VMware Guest and boot it, to kick start the recovery.
The trick is to copy the ISO onto the Mac’s filesystem and attach it to the Guest from there. I found (out the hard way) that if you have the ISO on the backup disk and attach it from the backup disk, it means you will not be able to subsequently map the backup disk to the Guest via USB.
The rest of this recovery follows ordinary BMR instructions, as documented here
My experiences
I actually did the recovery twice. What you see in the video is my second attempt, where I was able to connect the disk via a USB pass-through. The whole process was remarkably simple. There are absolutely no hiccups – it was so easy, in retrospect it didn’t seem extreme at all! I was hoping to exercise my I.T. prowess by doing something fancy, and was disappointed.
However, the first recovery I attempted was the opposite. I made the mistake of attaching the Lifeline Media ISO from the backup disk itself – something I did not realize until much later. I tried grappling with mapping the USB disk to the guest – something that I was ultimately unable to do. After 9 minutes, I admitted defeat… and then had another idea – keep the backup disk connected to the host, and then expose it via a Network Share from the host to the guest, using Apple File Sharing. That ended up working, but my hands-on time blew out to nearly 18 minutes.
If I get time in the future, I’ll document my experiences on that run, and compare the two. Without a doubt, USB pass-through may fail so it’s nice to have a fallback method for exposing the backup to the Guest.
Performance analysis
It’s interesting to compare the time taken for this P2V VMware Fusion Guest BMR, against the P2P Intel Nuc that I did earlier. Let’s see how things stack up:
| P2V VMware Fusion (Mac) | P2P Intel NUC | |
| Create the Lifeline Media on ISO | 1 minutes 6 seconds | 1 minute 18 seconds |
| Boot the Lifeline Media | 35 seconds | 45 seconds |
| Data transfer (re-image the disk) | 23 minutes 28 seconds | 5 minutes 33 seconds |
| Reboot, detect new hardware, and get to login screen | 1 minute 52 seconds | 1 minute 6 seconds |
It’s quite clear that the first two operations are faster on my P2V recovery – most likely due to the fact that my ISO created on and run from a solid state drive, whereas the P2P used a USB Flash Drive.
What was unexpected is how much slower the data transfer was.
Given the backup VHDX file size of 50,138,331,579 bytes, the recovery speed was therefore 35,609,610 bytes per second, or 35.6 MB/s.
In contrast, the P2P recovery ran at 150.6 MB/s.
I conclude that the USB pass-through is very slow in VMware Fusion in comparison to native. This is a useful finding to know for the future.
Conclusion
The challenge was easier to do than I expected. It was pleasing that the recovery was successful, as would be expected from a “Recover Anywhere” product.
There are so many other extreme recoveries that are possible, I look forward to hearing about your adventures!
Related Articles