TL;DR Summary
- You can back up Intermedia mailboxes off-platform (i.e., independent of the Intermedia platform) as PST files using BackupAssist 365.
- BackupAssist 365 allows you to save the Intermedia Exchange PST files locally or to network storage.
- BackupAssist 365 allows you to automate the backup process.
Prerequisites for BackupAssist 365 and Intermedia Exchange mailboxes
Before we get started, here’s what you’ll need:
- A storage location for the PST files – You can save files locally or to a network drive. In our example, we’ll cover how to do both – just make sure to have a reliable backup location in mind before you get started.
- A BackupAssist 365 installation – We’ll assume you already have BackupAssist 365 installed. If you don’t, you can sign up for a free trial here.
- The login information for your Intermedia Exchange mailboxes – You’ll need the email addresses and passwords for the mailboxes you’re going to back up.
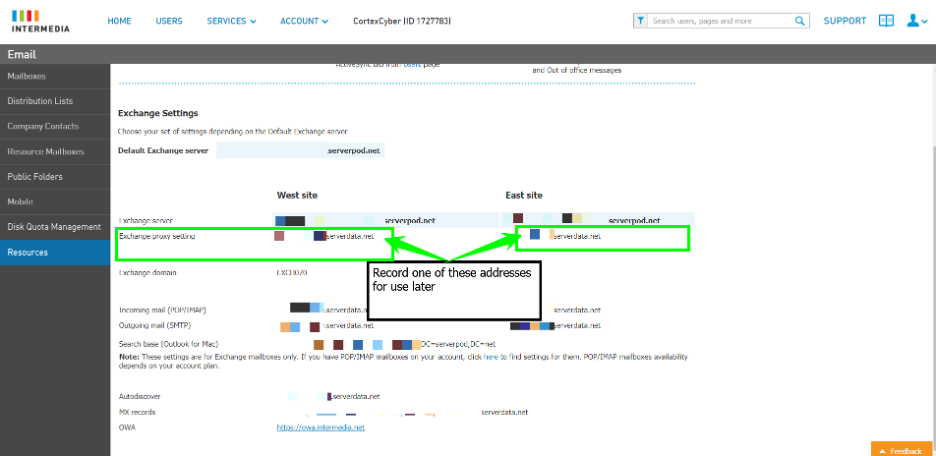
- Your Intermedia Exchange Server address – Additionally, you need to know which Intermedia Exchange server to use. You can find your Exchange Server information by logging into your Intermedia HostPilot account and navigating to
Exchange Email → Resources → Exchange proxy setting.
How to back up Intermedia hosted Exchange mailboxes with BackupAssist 365
With the prerequisites out of the way, let’s jump into the process for backing up Intermedia Exchange mailboxes to local or network storage.
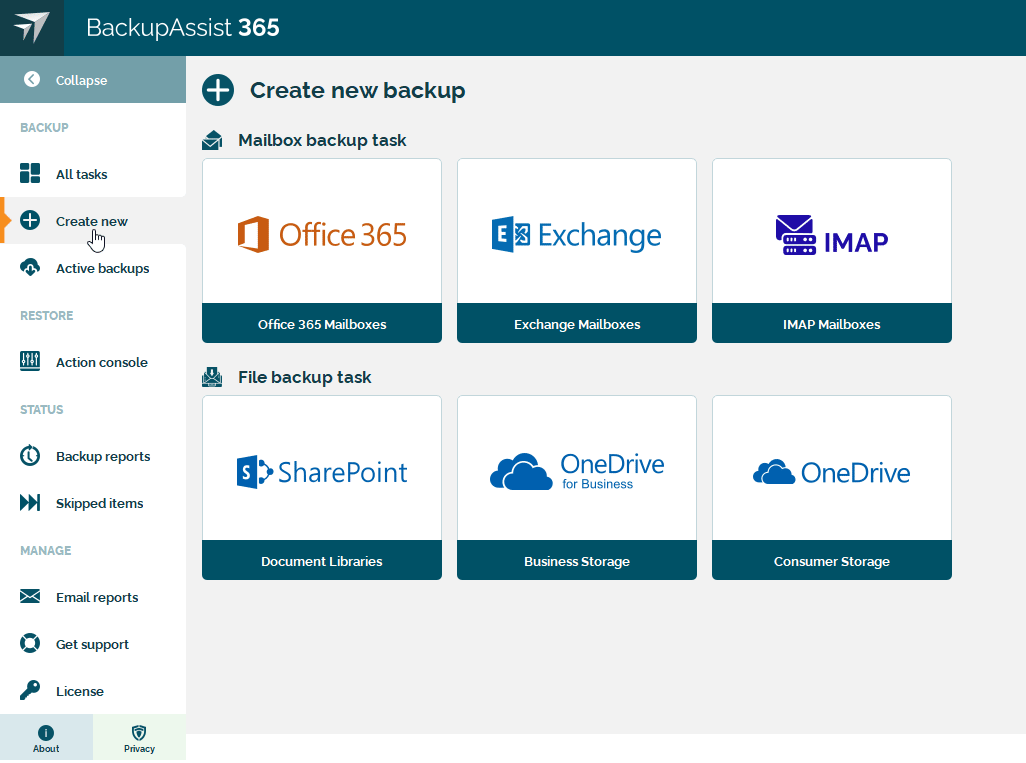
Step 1: Launch BackupAssist 365 and create a new “Exchange Mailboxes” backup
To get started, launch BackupAssist 365 and click Backup → Create New → Exchange Mailboxes
Step 2: Name the back up and select multi-user or single-user
Next, we’ll give the backup task a unique Task name.
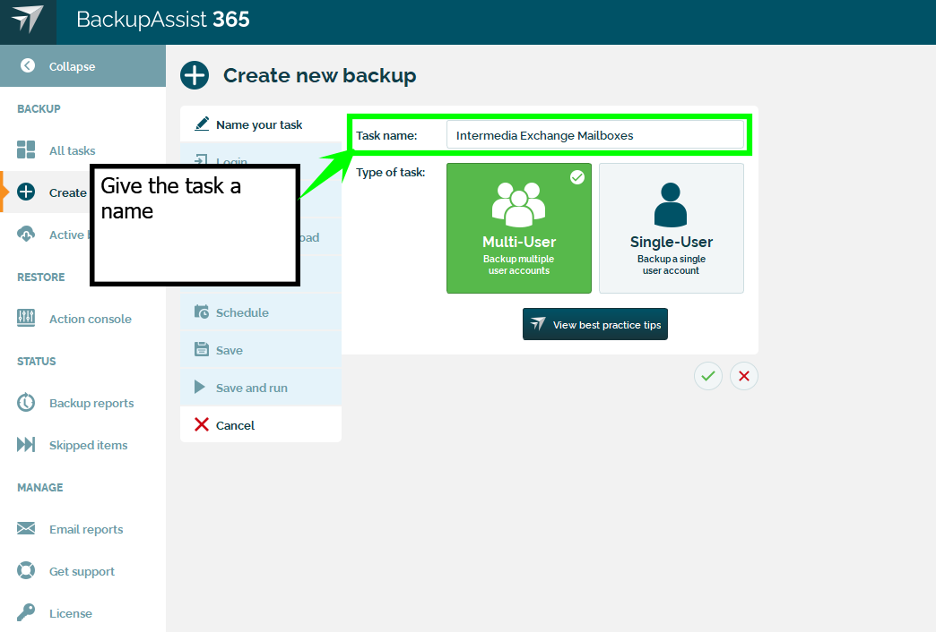
Then, select Multi-User if you want to back up multiple Intermedia Exchange mailboxes or Single-User if you want to back up just one mailbox. Once your selection is made, click the green checkmark icon to proceed.

Step 3: Input the Intermedia Exchange server information
The next steps will vary slightly depending on whether you selected Multi-User or Single-User in Step 2.
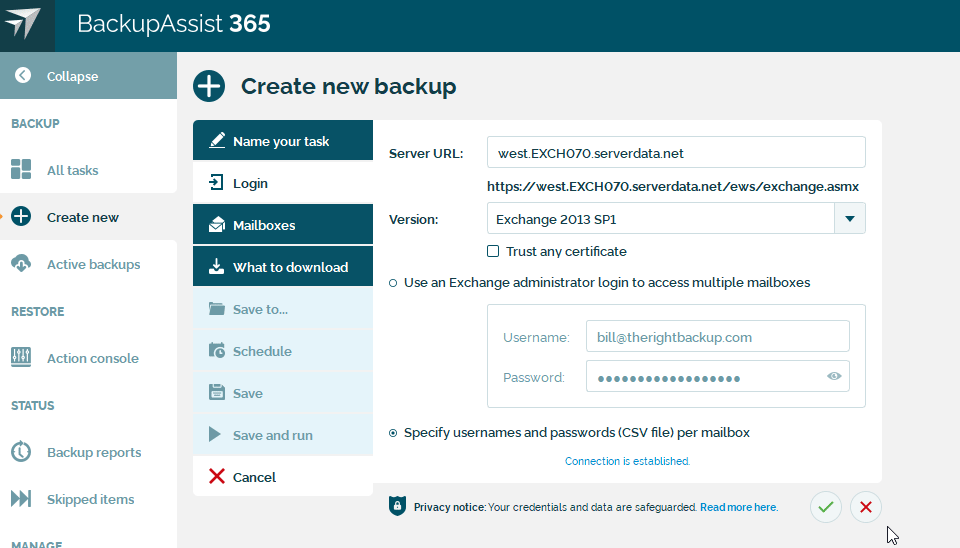
For Single-User backups
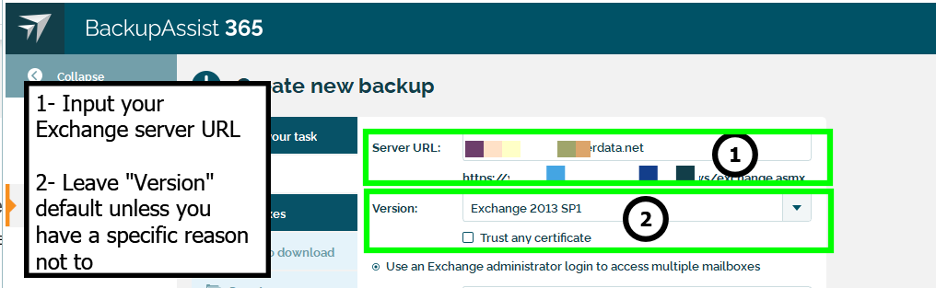
On the Login screen, input the following information:
- Server URL: The Exchange server address for your Intermedia Exchange server. This is the Exchange proxy setting URL we mentioned in the prerequisites.
- Version: The Exchange Server Version for your Intermedia account. Generally, on current Intermedia Exchange Servers, most versions supported in BackupAssist 365 will work to create our backup task. Therefore, unless you receive an error message, the backup fails, or you are an advanced user with a specific purpose, leave this setting at the default.
- Username: The email address of the mailbox you want to back up.
- Password: The password associated with the email address of the mailbox.
Then, click the green checkmark icon and proceed to Step 4.

For Multi-User backups
If you selected Multi-User backups, on the Login screen input the following information:
- Server URL: The Exchange server address for your Intermedia Exchange server. This is the URL we mentioned in the prerequisites.
- Version: The Exchange Server Version for your Intermedia account. Generally, on current Intermedia Exchange Servers, most versions supported in BackupAssist 365 will work to create our backup task. Therefore, unless you receive an error message, the backup fails, or you are an advanced user with a specific purpose, leave this setting at the default.
 |
Note: Because Intermedia accounts do not have the required Exchange privileges, the Use an Exchange administrator login to access multiple mailboxes feature is not supported with Intermedia Exchange. |
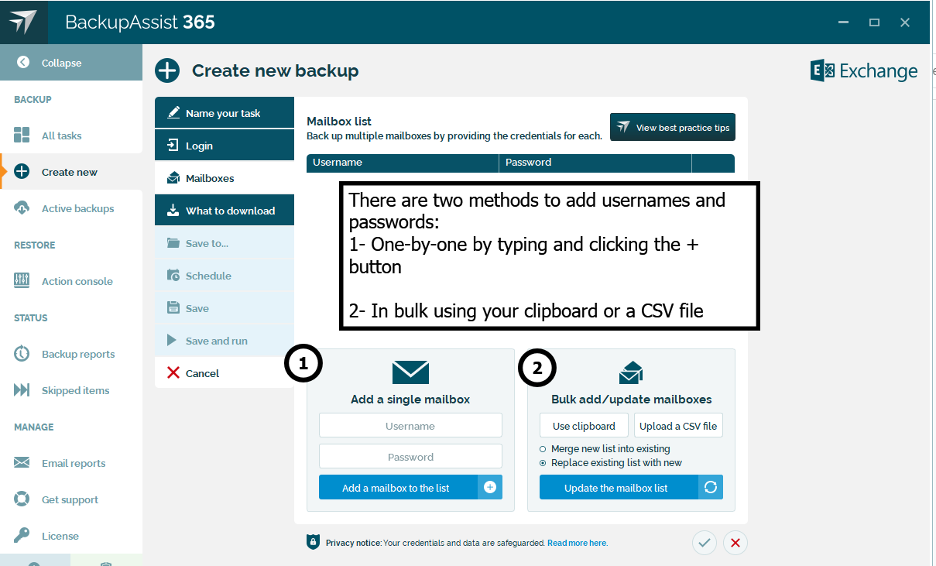
Then, select Specify usernames and passwords (CSV file) per mailbox and follow these steps:
-
Click the green checkmark icon to proceed to the next screen.

-
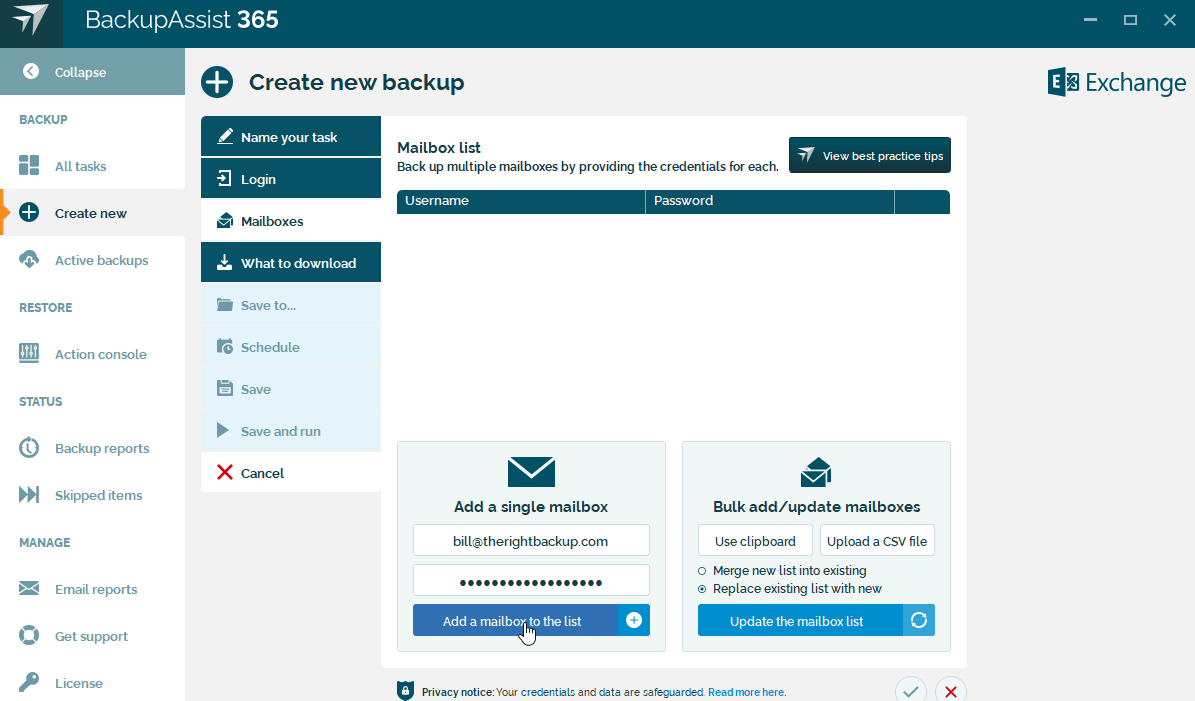
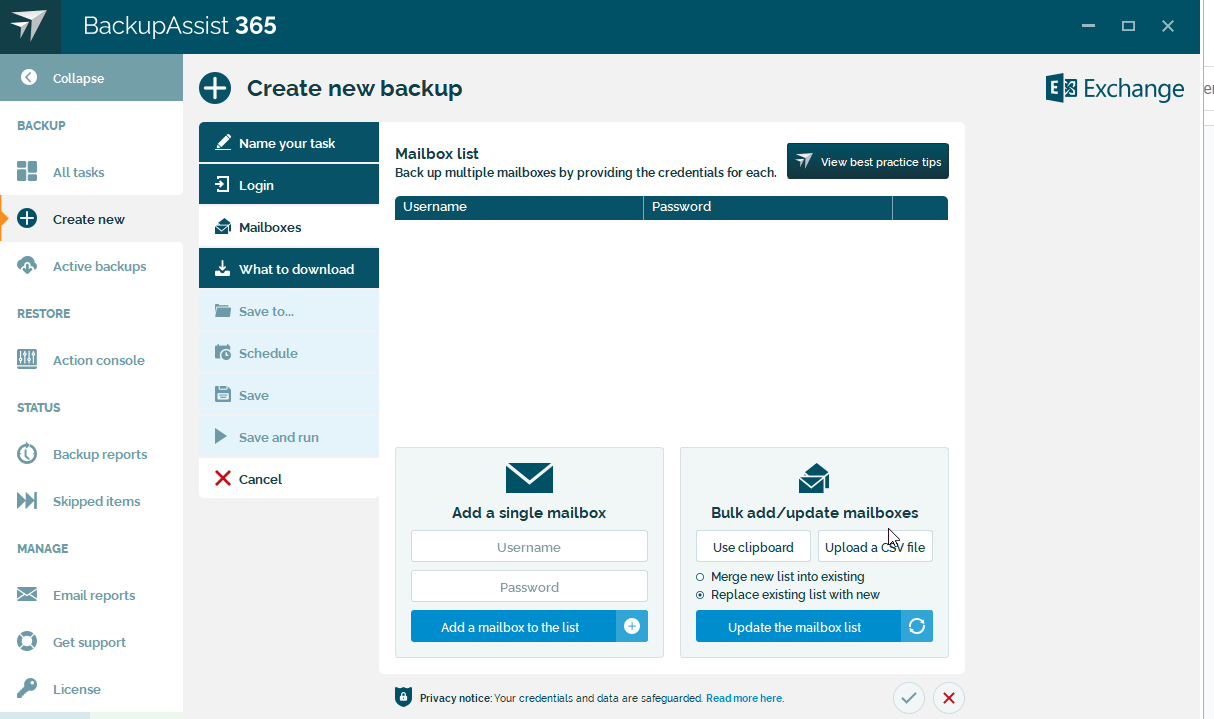
Now, you can either input email addresses and passwords individually (a.) or in bulk (b.).

-
To input passwords individually, simply input the Username and Password for the mailbox and then click the + icon. Once you have added all the accounts, click the green checkmark icon to proceed.

-
Alternatively, you can bulk upload email addresses and passwords from a properly formatted CSV file (email addresses in Column A, passwords in Column B) by uploading the CSV file directly, or using your clipboard.

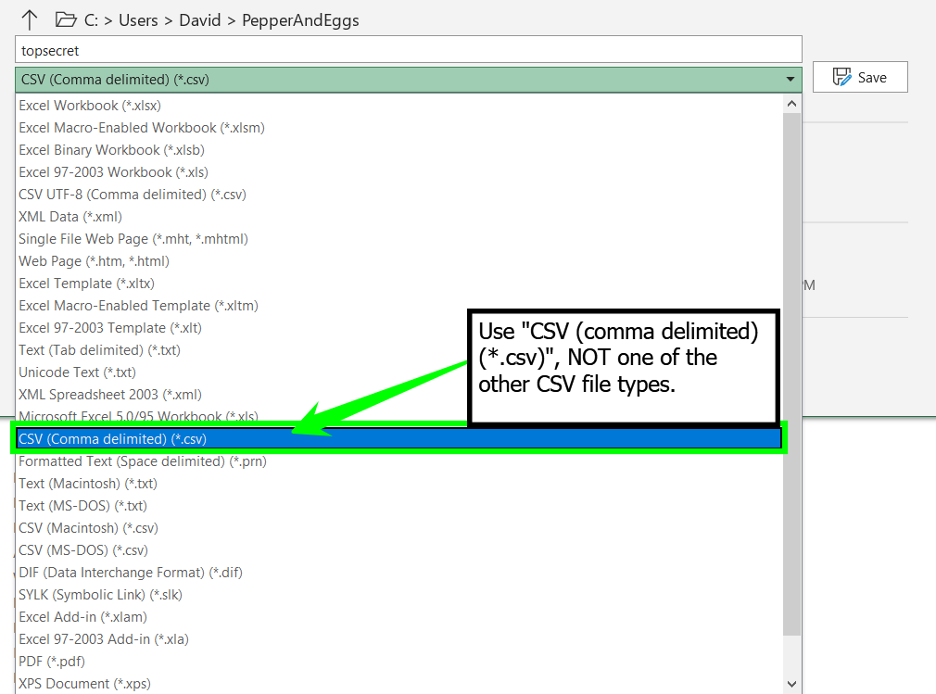
Once you have uploaded the CSV file, click on the Update the mailbox list button to refresh the Mailbox list. Then click the green checkmark icon and proceed to Step 4. Here’s an example using the CSV file upload method:


Pro-tip: If you’re using Microsoft Excel to create your CSV files, for best results with bulk adds, be sure to save the file as “CSV (comma delimited)(*.csv)”. 
-
To input passwords individually, simply input the Username and Password for the mailbox and then click the + icon. Once you have added all the accounts, click the green checkmark icon to proceed.

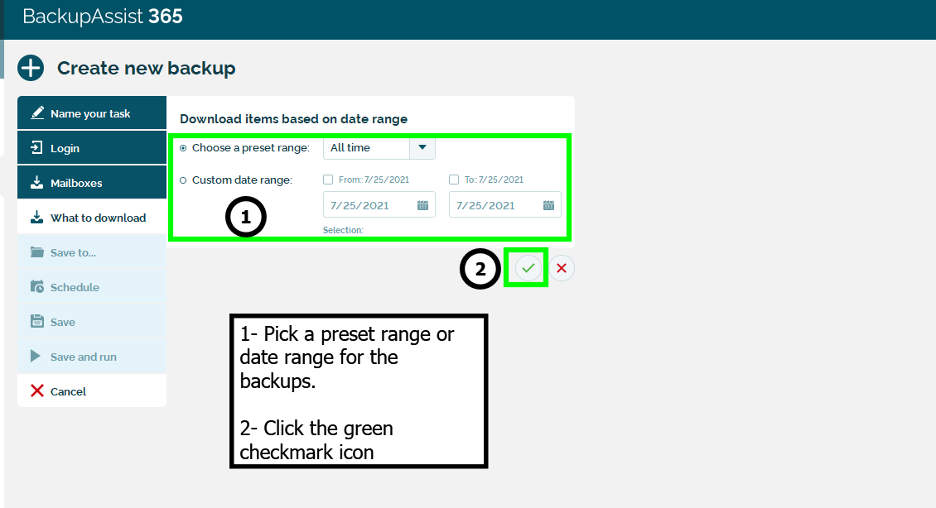
Step 4: Select a download range for the backups
On the What to download screen, select the date range you want your backups to cover. If you want to back up everything in the mailbox regardless of the date, select “All time” as the preset range. Alternatively, you can select from a list of preset ranges (e.g., “This year”, “This quarter”, “Last 7 days”, etc.) or define a custom date range. Once you make your selection, click the green checkmark icon to proceed.
Step 5: Select a storage location for the Intermedia mailbox PST file backups
Now we can tell BackupAssist 365 where to store the PST backups. You can save the files locally or to a network folder such as a shared directory on a NAS.
To save the PST file backups for the Intermedia mailboxes in a local directory
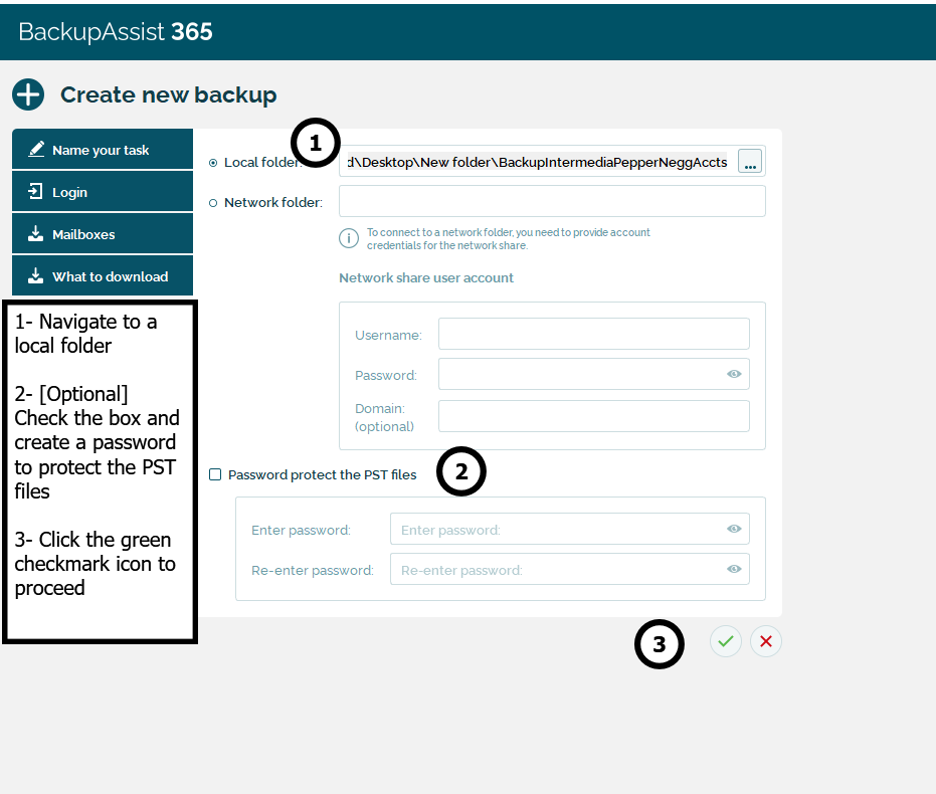
- Select the Local folder: radio button and navigate to the local folder you want to save the files to.
- [Optional] Check the Password protect the PST files box and create a password to protect the PST files if you want to add additional security to the backups.
- Click the green checkmark icon to proceed.
To save the PST file backups for the Intermedia mailboxes in a network directory or shared folder on a NAS
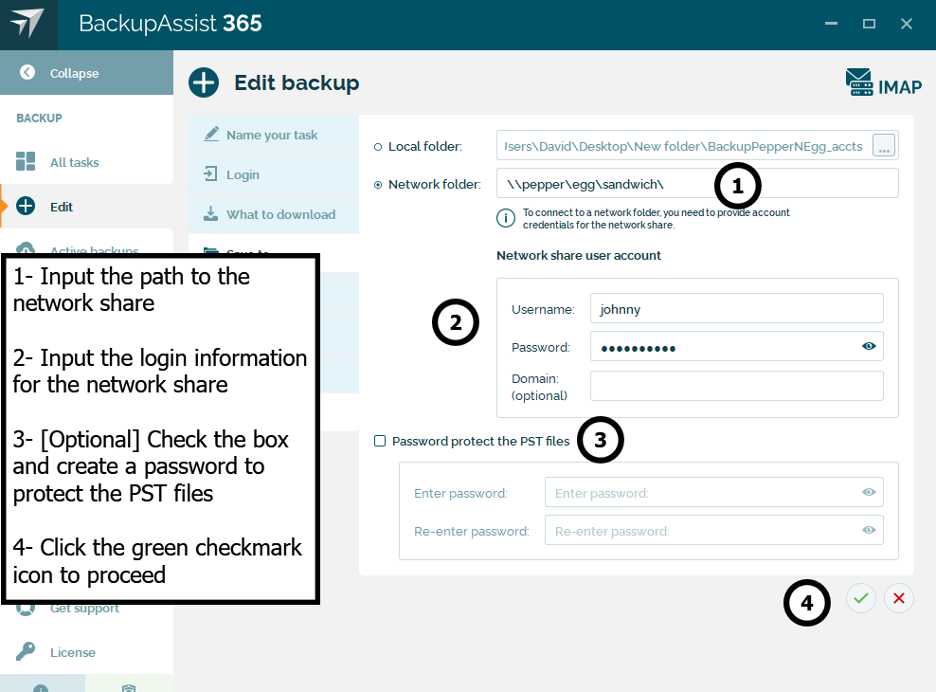
- Select the Network Folder radio button and input the path to the network share.
- Input the login information for the network share.
- [Optional] Check the Password protect the PST files box and create a password to protect the PST files if you want to add additional security to the backups.
- Click the green checkmark icon to proceed.
Step 6: Schedule the Intermedia Exchange mailbox backup frequency
On the Schedule tab, configure a frequency for the backup schedule to occur and a maximum runtime window the backup is allowed to run. If a backup runs longer than the defined window, the task will stop and the next backup will pick up where this task ended. More information on using backup windows in BackupAssist 365 can be found here.
For example, below we have configured our backups to run Monthly on every second Monday of the month at 1:00 a.m. and cancel if the backups take more than 10 hours.
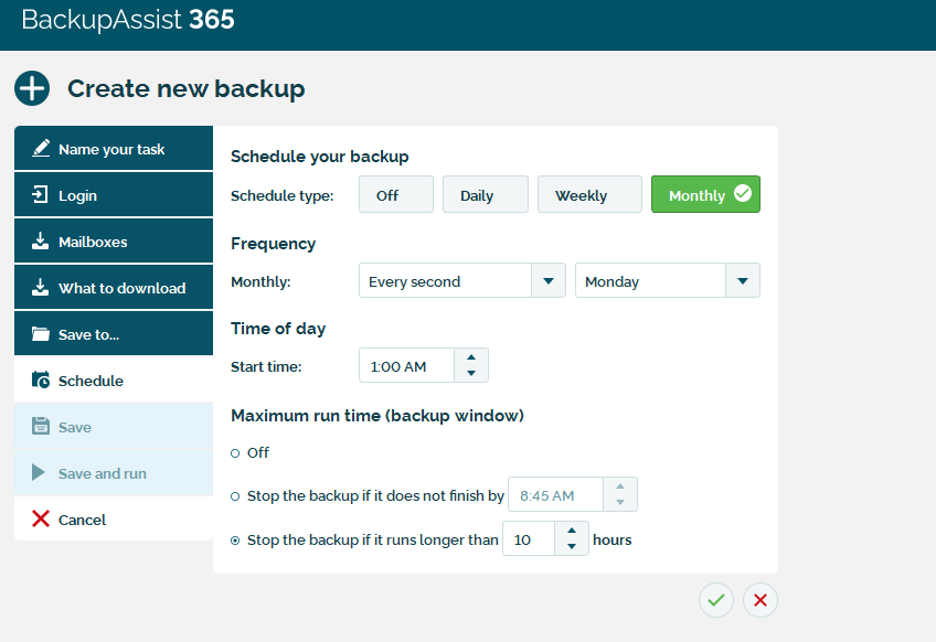
Once your backup schedule is configured, click the green checkmark icon to proceed.
Step 7: Save or Save and Run your Intermedia Exchange mailbox backup
Now, you can Save your backup, and it will run on the next configured run date you scheduled in Step 6. Or you can select Save and Run to save the backup and run it now. To test our configuration, we’ll choose Save and Run here. The backup will begin and we’ll see real-time progress information in BackupAssist 365.

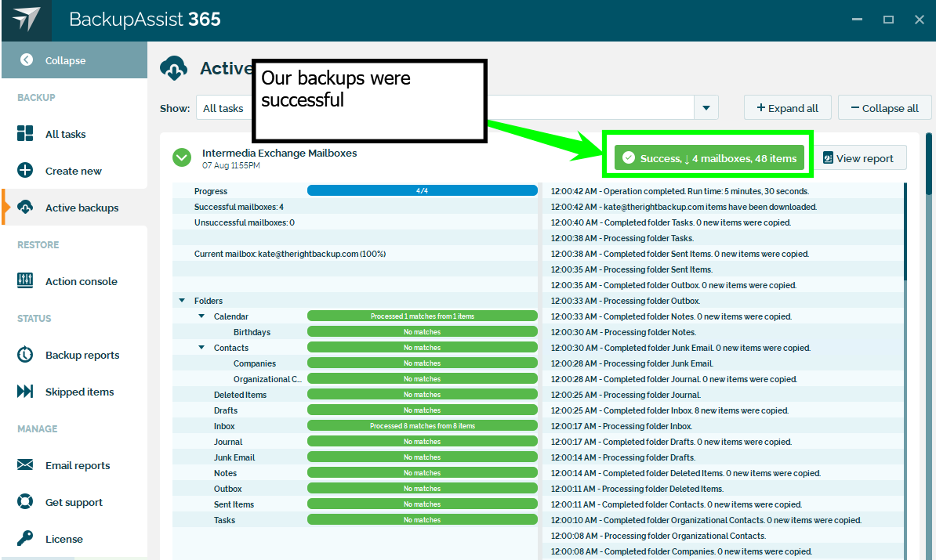
Step 8: Confirm your PST files are saved
That’s it! Once the backup completes, you’ll see a confirmation in BackupAssist 365. You can now check the local or network folder you selected in Step 5 and you will see the PST files for each mailbox. If you configured the backup to occur at a regular interval, BackupAssist 365 will run them automatically.

Conclusion: Off-platform Intermedia Exchange backups add resilience to your business mailboxes
Backups and disaster recovery (DR) are all about resilience and contingencies. Intermedia’s SecuriSync backups help admins with on-platform backups, and BackupAssist 365 makes it easy to back up mailboxes off the Intermedia platform to local storage or to a NAS device. With off-platform backups, you can add flexibility and resilience to your email backup and DR strategy.