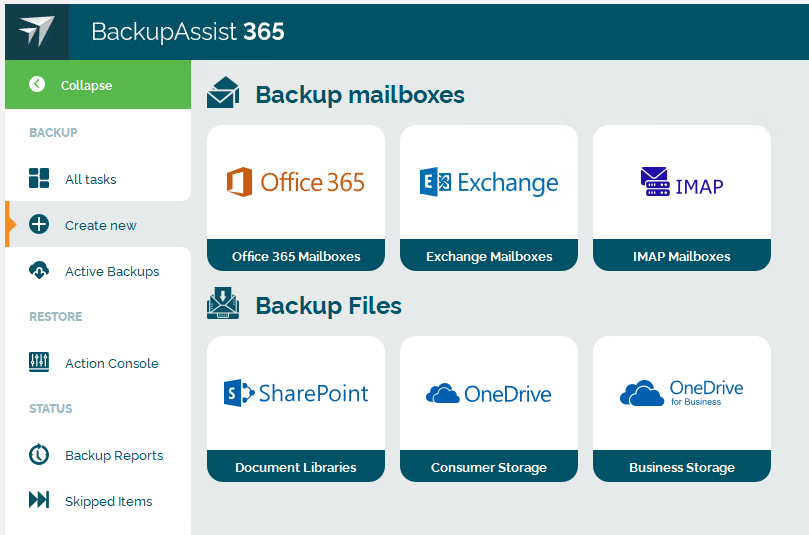
TL;DR Summary
- You can back up IMAP mailboxes using BackupAssist 365.
- For multi-user environments, the BackupAssist 365 GUI enables you to provide multiple login details via a CSV file, or copy and paste from Excel.
- Backups are stored as PST files, chosen for maximum compatibility and accessibility.
- This works for a wide variety of cloud mailbox providers
Walkthrough – setting up an IMAP mailbox backup
Let’s assume that you’ve already downloaded and installed BackupAssist 365.
Step 1: Create a new IMAP Mailboxes backup task
Step 2: Choose between single-user and multi-user mode. Most businesses will choose multi-user in order to get backups of multiple mailboxes from a single backup task. Even if you only have one mailbox to back up now, that could increase in the future, so we recommend multi-user mode.
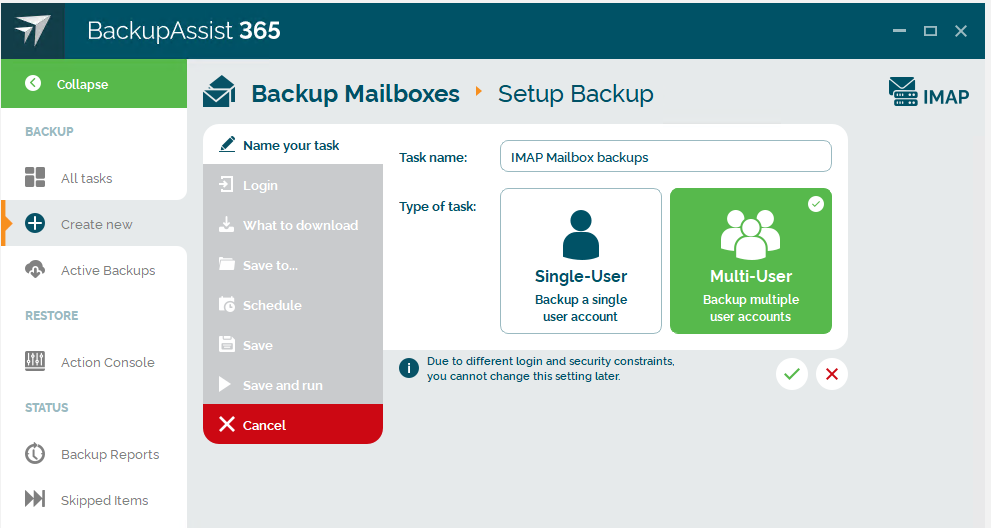
The rest of this article assumes you chose multi-user mode.
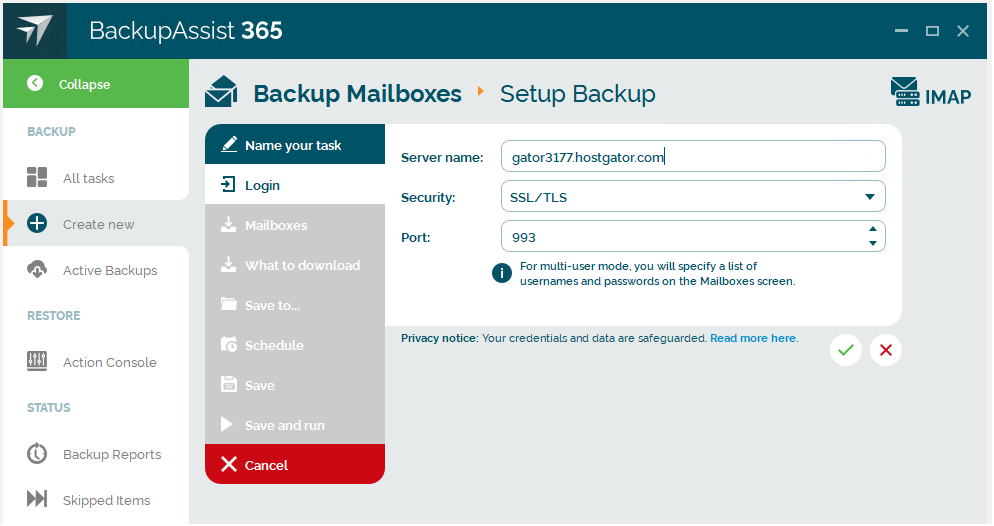
Step 3: Enter the details of the mail server. The server name and port should be provided to you by your cloud service provider. The examples below are for our own test account, hosted by Hostgator.
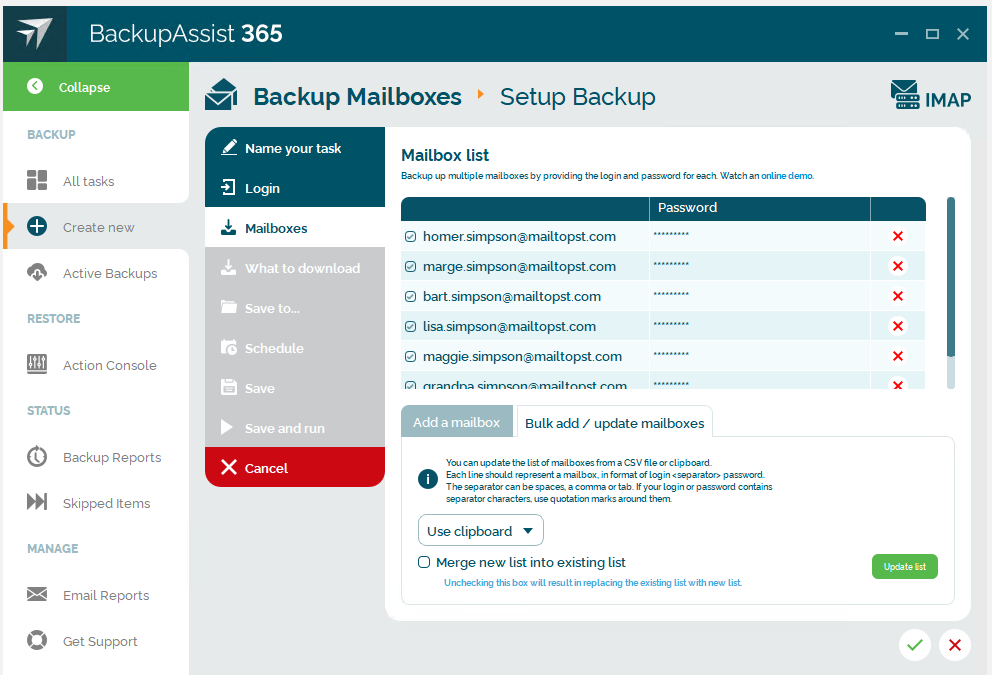
Step 4: Upload the list of mailboxes
This is the trickiest part of the entire process – and even then, it’s usually straightforward.
If you only have a few mailboxes, you can add mailboxes one-by-one by entering the username and password and clicking the plus (+) symbol.
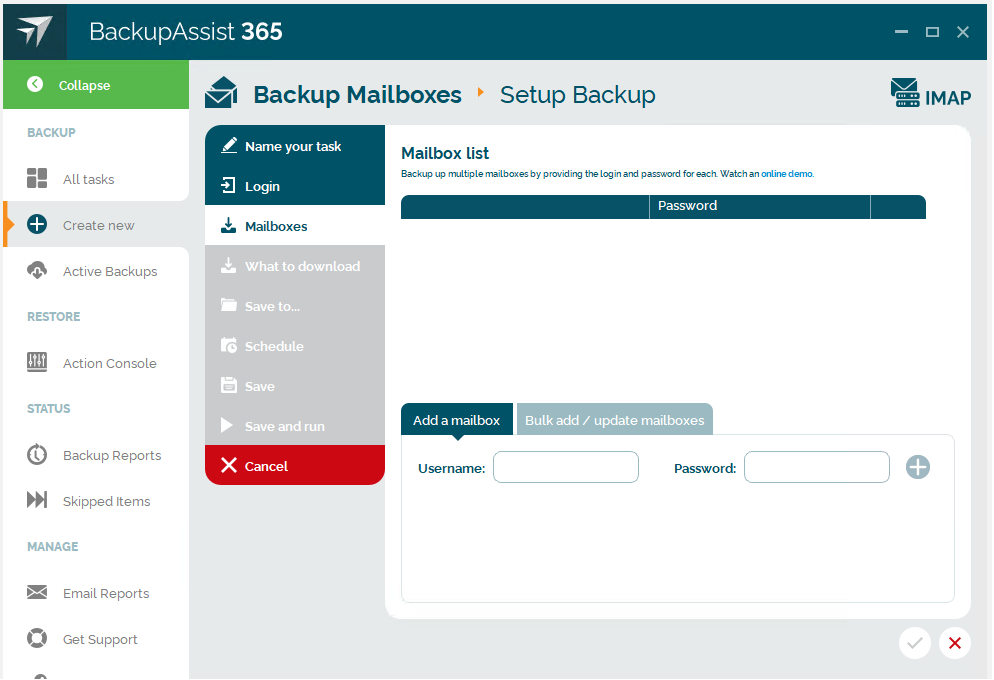
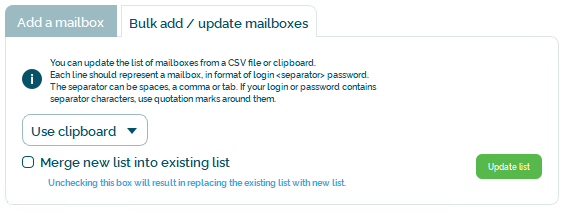
However, if you have more than say 3 mailboxes, you’ll find the bulk add / update feature very useful. This enables you to use either a CSV file, or a clipboard cut & paste, to get the job done.
Managing passwords for multiple users is always a pain.
For now, let’s assume you’re using a password encrypted Excel spreadsheet. (If you use something different, we’ll cover that later in this blog.)
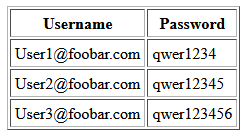
The list will look something like this:
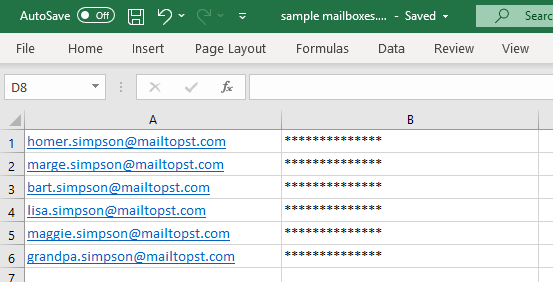
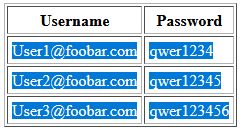
The fastest way to get the list of mailboxes into BackupAssist 365 is by copy and paste. Simply highlight the cells and copy them to the clipboard (Control-C on Windows, or Command-C on Mac).
Then in BackupAssist 365, click the Bulk add / update mailboxes tab, select the option to Use clipboard and then click the Update list button.
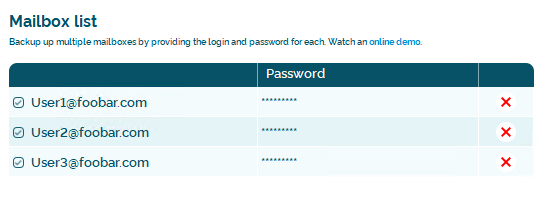
Your list of mailboxes should appear:
Note: in the future, if you need to update any mailbox details, you can easily repeat the process.
- If the checkbox Merge new list into existing list is checked, then the new list is “merged” into the old list, so that existing records are updated while new records are added. Items in the old list that are not in the new list will still remain.
- If the checkbox is not checked, then the old list is discarded before the new list is imported. That means, items in the old list that are not in the new list will be removed.
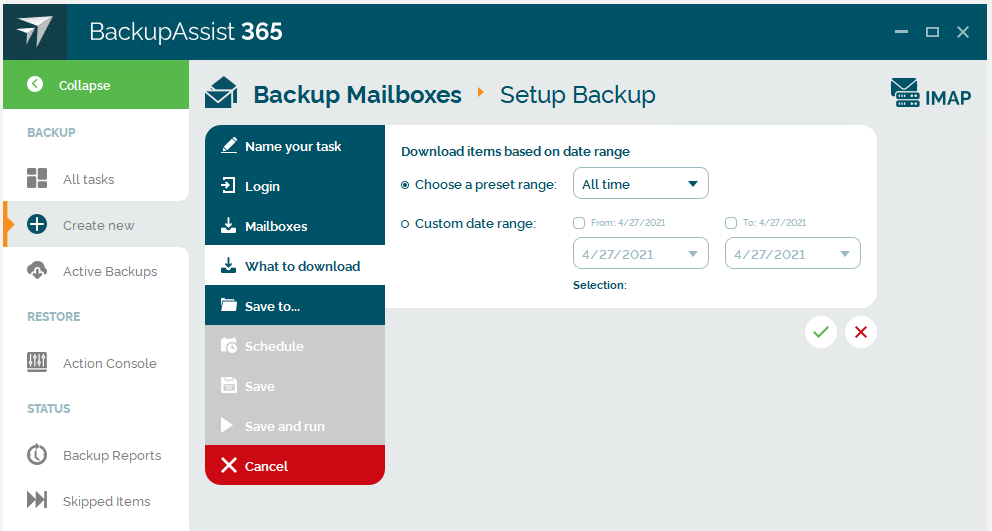
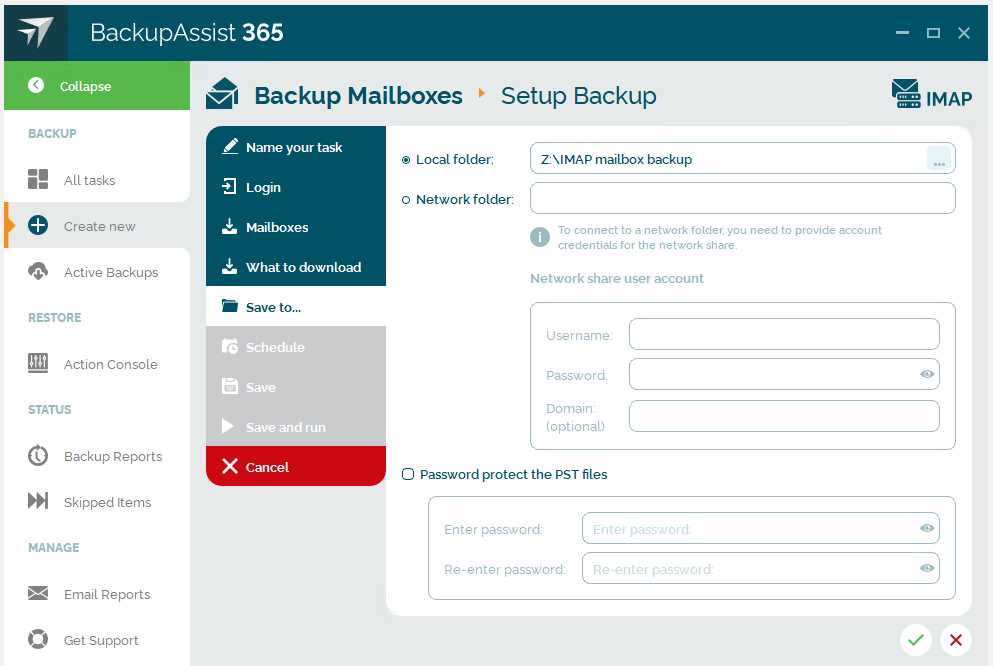
Step 5: complete the rest of the setup. You’ll see options for choosing what to include in the backup, where to put the backup files, whether to turn on PST passwords, and scheduling.
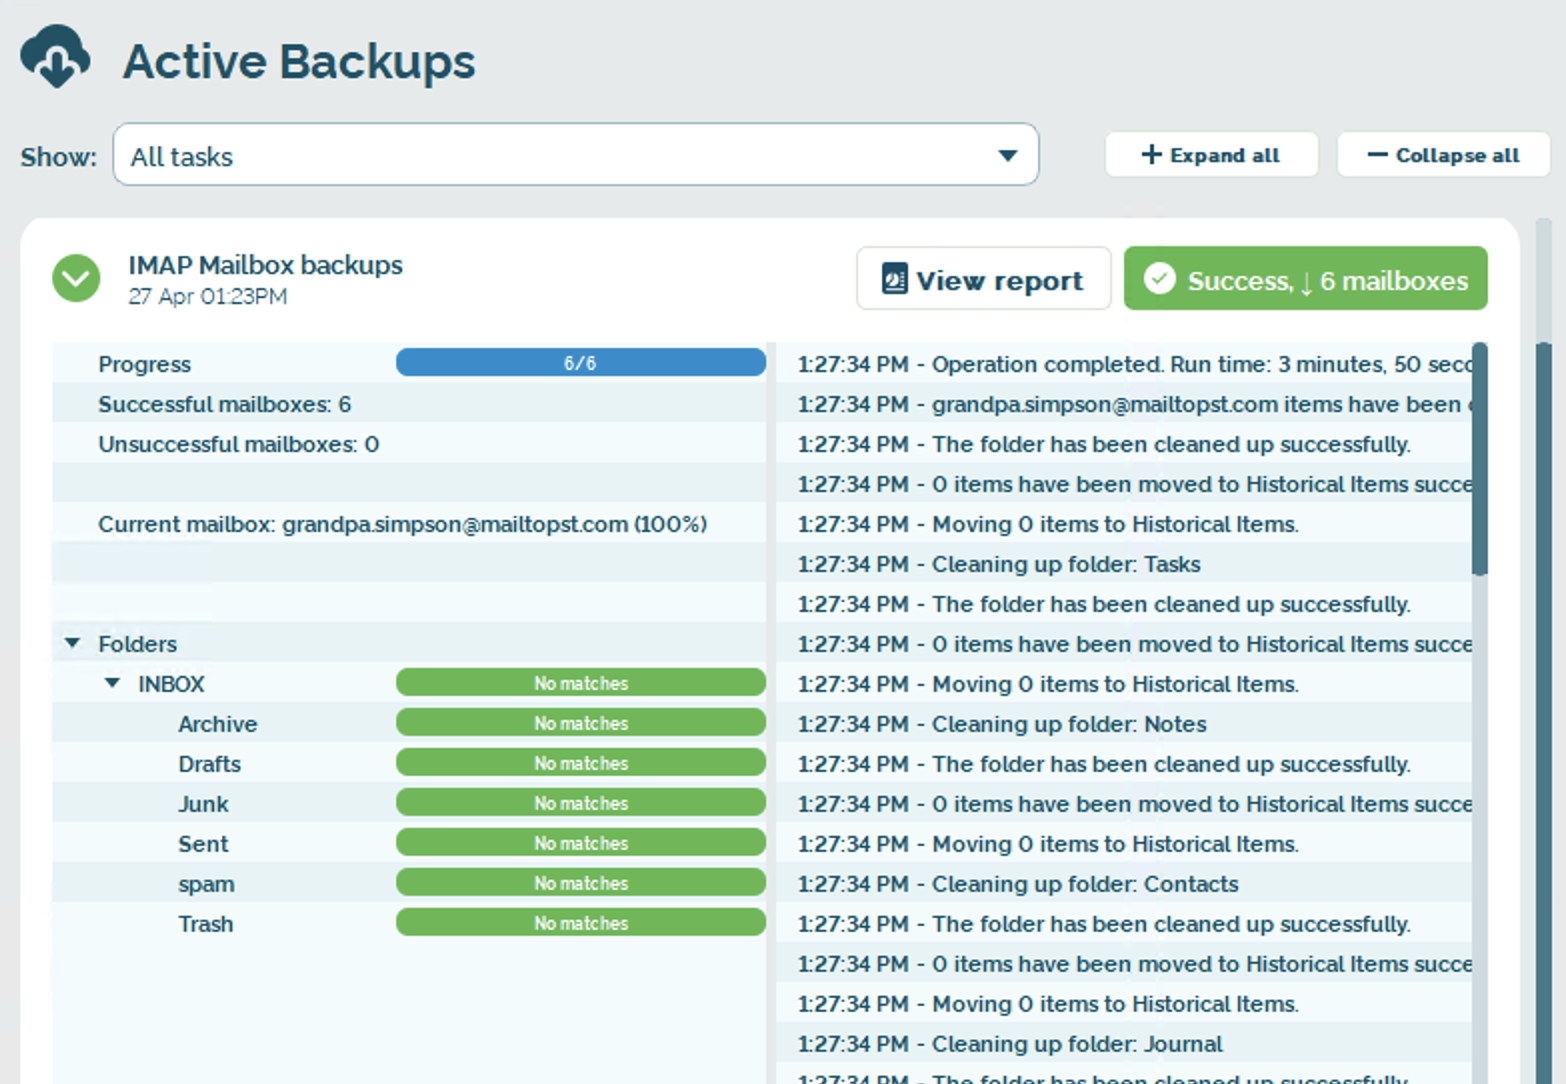
Step 6: save and run the backup. You’ll then see live progress of your backups running. If you’re a fan of backups, it’s a lot more interesting than watching grass grow. 😊
A brief security reminder
- If you use the clipboard, it’s a good idea to clear the clipboard immediately afterwards by copying some innocuous text from your favourite website.
- If you use a CSV file, it’s a good idea to securely delete it immediately afterwards.
What if you’re not using Excel to manage your list of mailboxes?
Yes, we know what you’re thinking – “I manage my usernames and passwords differently!”
Every sysadmin has his or her own preferences. Fortunately, our CSV and clipboard importing has very flexible logic that can interpret the output of many different sources.
HTML tables are a good example.
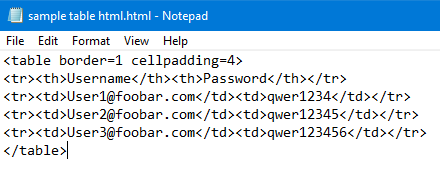
Let’s say you have this table in a web browser:
Select the rows of the table (excluding the header) and copy it to the clipboard:
When you import it into BackupAssist 365, the mailboxes will now appear:
For the curious, the raw HTML is just a simple table, as shown below.
Our parser can work with:
- Comma separated, or tab separated data
- With or without quotation marks
- Complying with the CSV specification, or not
Why did we choose to store the mailbox backups as PST files?
A backup is only useful if you can access your data now and well into the future. If your backup is locked into a proprietary format or database, and the software is no longer available, it can be expensive or impossible to extract your data.
That’s why we choose an open format. For mailboxes, there were three possible choices:
- Mbox
- Maildir
- PST
All 3 formats will work fine for IMAP mailboxes. But because BackupAssist 365 was also designed to work with Exchange Server, the only suitable option was PST, because it is the only format that supports Exchange specific mailbox items (such as the Microsoft flavored versions of calendars, notes, contacts, todos).
With PST files as the backup format, the advantages are numerous:
- You can access your data with Outlook or other freely available tools.
- PSTs can be imported into Office 365
- In the case of legal discovery, there are services that will print the contents of PST files for court.
Doesn’t my cloud provider do backups of my IMAP mailboxes and emails?
We can’t speak for every cloud provider, but in general, when a cloud provider performs a backup, it’s so they can keep their service running in case of a cyber attack or hardware fault.
Unless your cloud provider states otherwise, it’s still your responsibility to maintain backups of your own data to protect against accidental deletions, ransomware, and to comply with data retention laws.
Thankfully, backing up IMAP mailboxes and emails is now straightforward and inexpensive with BackupAssist 365.
Let us know your feedback…
You can try BackupAssist 365 free for 30 days. You’ll have backups of your IMAP mailboxes in no time at all.
As always, our Client Success and Technical Support teams are ready to help and support your trial.
Did it work for you, out of the box?
Or perhaps, your specific password management solution outputs data in a format we don’t support yet?
Let us know! We thrive on feedback.
And with BackupAssist 365, you’ll safely back up your IMAP mailboxes.